Published 5 years, 6 months ago
In this tutorial you'll set up your project workspace. If you already have a C development workflow, feel free to skip this tutorial.
Note: This tutorial is for an outdated version of the mod runtime environment.
Contents
- 1 System
- 1.1 Environment Variables
- 1.2 AER Framework
- 1.3 C Compiler
- 1.4 Visual Studio Code
- 2 Mod Development Kit
- 2.1 Setup
- 2.2 Extensions
- 2.2.1 Proprietary
- 2.2.2 Open-Source
- 2.3 Clang
- 2.4 Tasks
- 2.5 Project Files
- 2.5.1 CMakeLists.txt
- 2.5.2 ModInfo.json
- 2.5.3 Assets
- 2.5.4 Sources
- 2.5.5 Headers
- 2.5.6 Copyright
- 2.5.7 Build
- 3 First Compilation
1 System
The MDK expects certain things to be true about your system in order to function.
1.1 Environment Variables
To start, you'll need to create an environment variable that tells the MDK (and aerman) where Hyper Light Drifter is installed on your system. Different Linux distributions have different methods of setting environment variables, but it generally involves adding an export entry to a bash script in your home directory. This script is likely called .profile, .bash_profile or .bashrc. (Though it could have another name. If in doubt, search "(your_linux_distro) add environment variable" on the internet.)
Once you've located this script, add the following entry to it:
export AER_GAMEDIR="$HOME/.local/share/Steam/steamapps/common/HyperLightDrifter"
This should be fine if you use the Steam version of HLD, but if your game installation is located somewhere else, make sure this environment variable reflects that.
Now you may have to log out and back in for this change to take effect.
1.2 AER Framework
Next, you'll need to make sure the AER modding framework, itself, has been installed to the location pointed to by the AER_GAMEDIR environment variable. See
this tutorial
for more information.
1.3 C Compiler
Now you'll need a somewhat recent version of a C compiler installed on your system. Using your package manager, make sure you have one of GCC or Clang installed. Either should work fine, but the MDK uses GCC by default, so you'll have to do some extra configuration if you use Clang.
Trying to compile a C project with just the compiler is a particularly error-prone task, so you'll also need the CMake build system. You should be able to install this using your package manager as well.
1.4 Visual Studio Code
Finally, you'll need an editor/IDE in which to do your development. There are a host of potential editors/IDEs that you can use for C development on Linux; it's really a matter of preference. The MDK uses Visual Studio Code, which is somewhere in between an editor and an IDE. It has its issues, but I felt that it offered the easiest and most straightforward mod development experience. Your package manager should be able to install this tool.
Note that VS Code comes in two variants: proprietary and open-source. Either will work fine for mod development, but there are a couple extensions you'll need that the proprietary variant can automatically install. If you use the open-source variant, you'll have to manually install these extensions (which I'll walk you through later). Personally, I use the open-source variant, but you should be able to follow along in this series of tutorials exactly the same using the proprietary variant.
2 Mod Development Kit
With your system properly configured, you're ready to setup your development workspace.
2.1 Setup
The first step is to download a copy of the MDK. There are several different ways you could do this, but downloading it from here is likely the easiest. Then extract the archive and name the resulting folder whatever you want to name your mod. Your mod's name should only contain lowercase ASCII letters, numbers, and underscores.
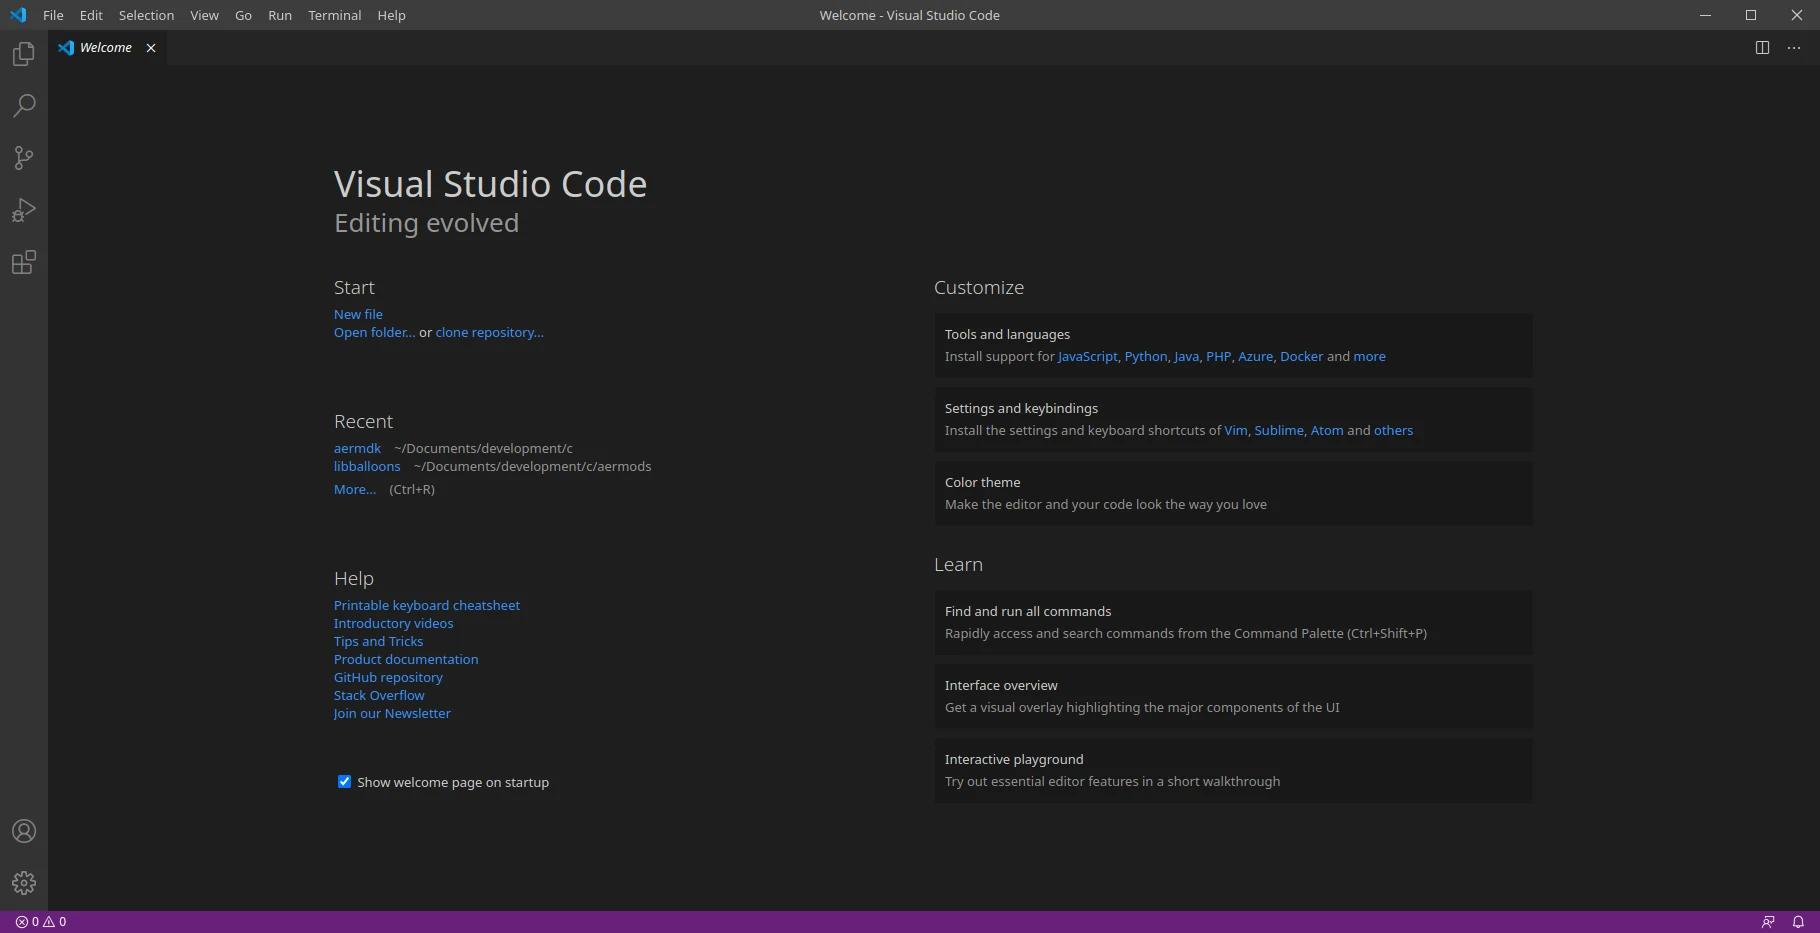
Now open VS Code. If all goes well, it should look something like this:
If you've never used VS Code before, I strongly suggest that you watch this guide by Microsoft before continuing.
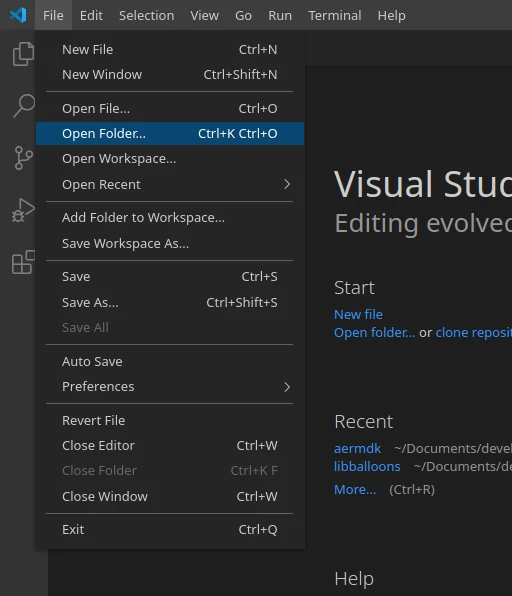
Next, click on the File menu, then select the Open Folder... option:
Navigate to and select the MDK folder you just extracted and renamed. Depending on which variant of VS Code you installed, there will be pop-up boxes in the bottom-right corner either recommending extensions or warning that VS Code can't find certain recommended extensions. Just close these boxes for now; you'll install extensions a bit later.
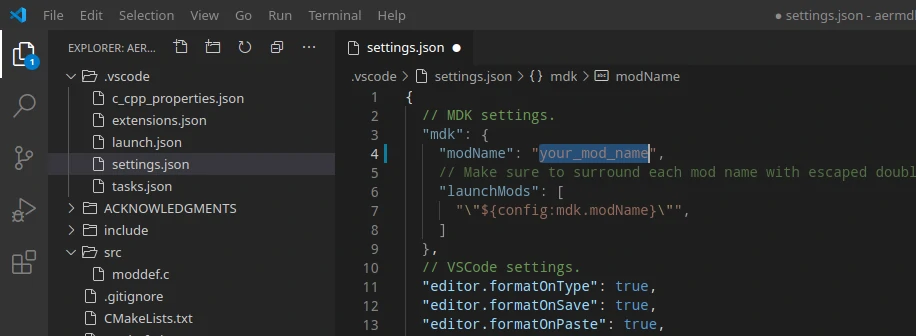
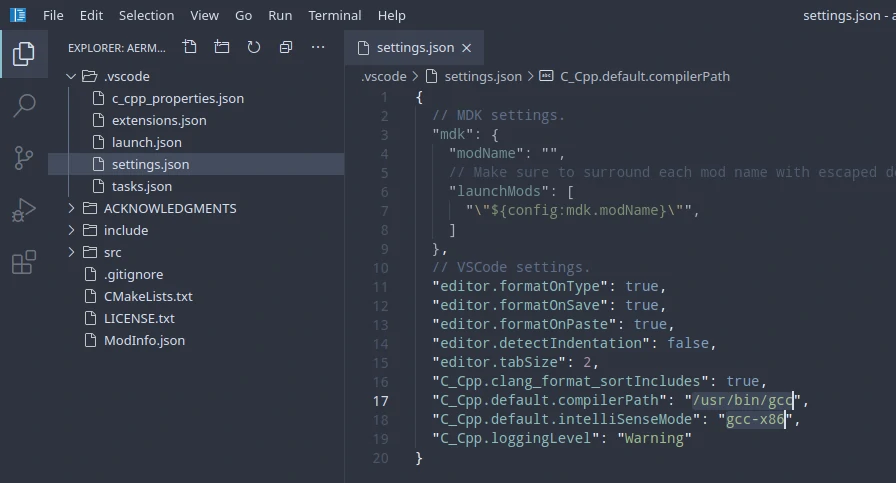
Then, from the Explorer tab on the activity bar, open the file .vscode/settings.json. Edit the mdk.modName entry to reflect the mod name you chose earlier:
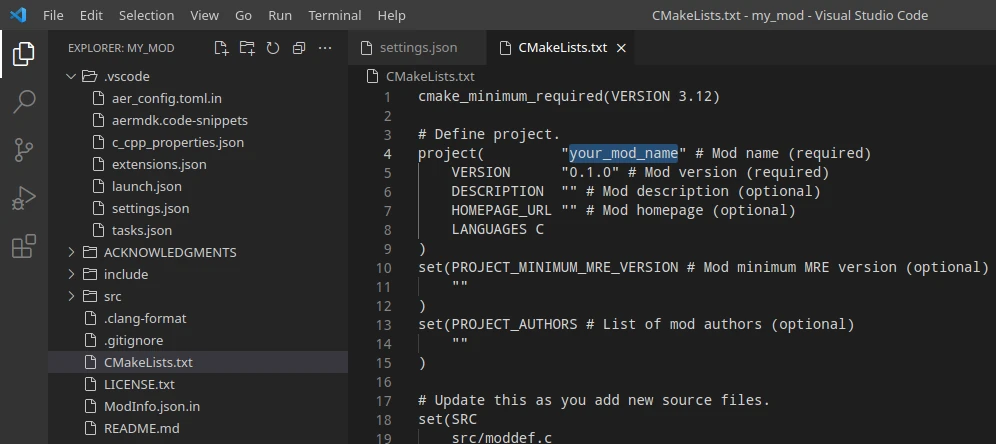
Following that, open the file CMakeLists.txt and edit the project command to reflect the same mod name:
2.2 Extensions
Now you're ready to install the VS Code extensions that I've recommended with the MDK.
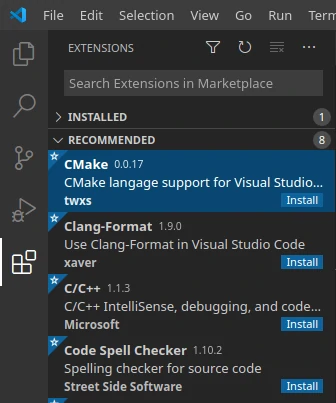
2.2.1 Proprietary
If you use the proprietary variant of VS Code, navigate to the Extensions tab of the activity bar and install the first four recommended extensions. There may be other extensions after the first four, but just ignore those:
2.2.2 Open-Source
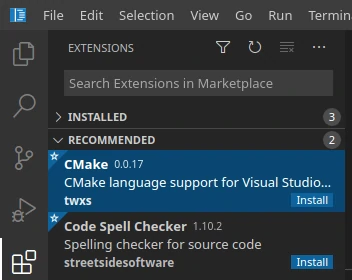
If you use the open-source variant of VS Code, navigate to the Extensions tab of the activity bar and install the first two recommended extensions. There may be other extensions after the first two, but just ignore those:
Next, download these two extensions from the VS Code Marketplace:
C/C++
and
Clang-Format.
Then click the ... in the top-right corner of the Extensions tab and select Install from VSIX...:

Then install the two extension files you just downloaded.
2.3 Clang
If you prefer to use the Clang compiler over GCC, then open the file .vscode/settings.json. Change the C_Cpp.default.compilerPath entry from /usr/bin/gcc to /usr/bin/clang and change the C_Cpp.default.intelliSenseMode entry from gcc-x86 to clang-x86:
2.4 Tasks
VS Code uses the concept of "tasks" to allow users to configure custom build commands. I've included a number of these tasks in the MDK, and you can view and run them by hitting Ctrl+P then typing "task " with a space at the end:
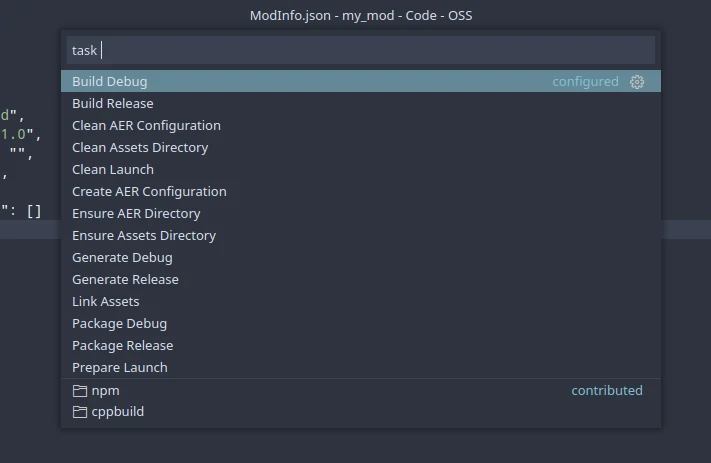
Most of these tasks are just internal dependencies for other tasks. The main ones you'll be interested in are:
Build Debug- compile your mod with debugging symbolsBuild Release- compile an optimized version of your modPackage Debug- build an installable debug archive of your modPackage Release- build an optimized, installable archive of your mod
The debug build includes ELF debugging symbols and other constructs that make it feasible to run your mod using a proper debugging tool. Generally speaking, you should be using debug builds when developing your mod and release builds when giving your mod to others/the public.
Since you'll likely be running the Build Debug task a lot throughout development, I've mapped it to the keyboard shortcut Ctrl+Shift+B.
2.5 Project Files
A mod project consists of the following key files and directories:
2.5.1 CMakeLists.txt
The CMakeLists.txt file is the main build script of your mod. The tasks I added to the MDK use this script in order to build and package your mod. It uses the
CMake Language.
The version option of the project command should generally follow the
Semantic Versioning Standard.
Technically, the version just needs to have between 1 and 3 numbers in it separated by periods.
You'll also need to add new entries to the:
set(SRC
  src/moddef.c
  )
command near the top of the file as you add new C source files to your mod.
2.5.2 ModInfo.json
The ModInfo.json file is the definitive source of metadata about your mod. The AER framework, itself, doesn't actually use this file, but I chose to make it part of the standard so that mod managers like "aerman" can get important information about mods at a glance.
Most of the fields are automatically populated from CMakeLists.txt, but I want to give configuration special mention. It lets external tools know how to configure your mod. You'll learn more about this field in a future tutorial.
2.5.3 Assets
While the MDK doesn't come with this by default, many mods will also need an assets directory at the root of their project. For now this is just used to hold mod sprites, but it will also be used for audio once the AER framework adds that support. Mods that don't add any custom sprites don't need an assets directory.
2.5.4 Sources
The src directory is where all of your C implementation files (the ones ending in ".c") should go. You are free to create whatever directory structure you want within this directory.
2.5.5 Headers
The include directory is where all of your
C header files
(the ones ending in ".h") should go. As was the case with src, you're free to organize the files within this directory however you want.
2.5.6 Copyright
While it is not a requirement, you are strongly encouraged to provide licensing and copyright information about your mod.
A basic LICENSE.txt file is provided in the root of your project. Users will have to accept this license before being able to install your mod (but you can delete it if you want). This license file should be used for both source code and asset licenses.
Here is a list of many pre-designed software licenses you can use. Note that there are even more than this website suggests. Most of the software in the AER framework uses the Apache 2.0 license.
Creative Commons provides a lot of great asset licenses. Most of the assets in the AER framework use either CC0 1.0 or CC BY 4.0.
The ACKNOWLEDGMENTS directory is where you can acknowledge the external libraries that you use. The copyright information for "aermdk" and "libaermre" have been pre-populated.
2.5.7 Build
The build directory is where your compiled/packaged mod assets are staged. Debug builds will go in build/debug and release builds will go in build/release. Your built mod library will be a file in either of those two sub-directories with the name lib<mod_name>.so, and the installable mod archive will have the name lib<mod_name>-<mod_version>.tar.xz.
3 First Compilation
Open the file src/moddef.c:
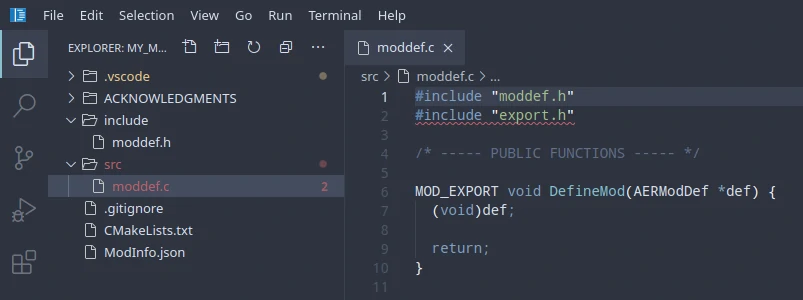
Notice the red squiggle underneath the line #include "export.h"? This is because CMake hasn't generated your build system yet. This is automatically handled any time you build, package or debug your mod, so go ahead and build your mod by pressing Ctrl+Shift+B. Now you may have to reload your mod project (just this once):
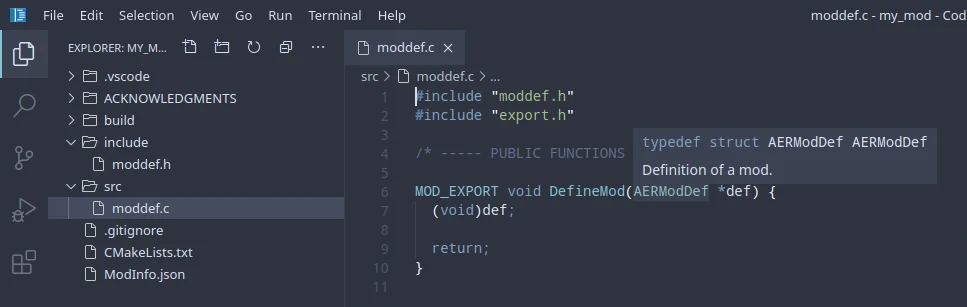
Now that you've generated your mod's build system (and also built the mod, itself), the IntelliSense tool provided by the C/C++ extension understands where all of your mod source and header files are located. As a result, the red squiggle from earlier is gone, and now you can hover your mouse over globals, structures and functions imported from the AER mod runtime environment to display a condensed documentation panel.
With that, your modding workspace is ready!
Note: This tutorial is for an outdated version of the mod runtime environment.
#dev #moddevtut